
Stuffed mashed potato nests are one of those dishes that feel both familiar and exciting at the same time. They combine the comfort of creamy mashed potatoes with the added delight of a savory filling tucked neatly inside a crispy, golden nest. Whether you’re planning a family dinner, preparing an impressive appetizer for guests, or looking for a creative way to use leftover mashed potatoes, this recipe delivers in every way.
This blog post offers a complete and well-structured guide to making stuffed mashed potato nests from start to finish. You’ll find detailed ingredient breakdowns, step-by-step instructions, variations, storage tips, serving suggestions, and answers to frequently asked questions. The goal is to help you confidently make this dish—even if you’re a beginner—while still offering enough depth and nuance for experienced home cooks who enjoy well-planned, flavorful recipes.
The recipe remains fully halal, uses simple ingredients, and works well for all seasons and occasions. Let’s walk through everything you need to know to prepare delicious stuffed mashed potato nests with ease.
What Are Stuffed Mashed Potato Nests?
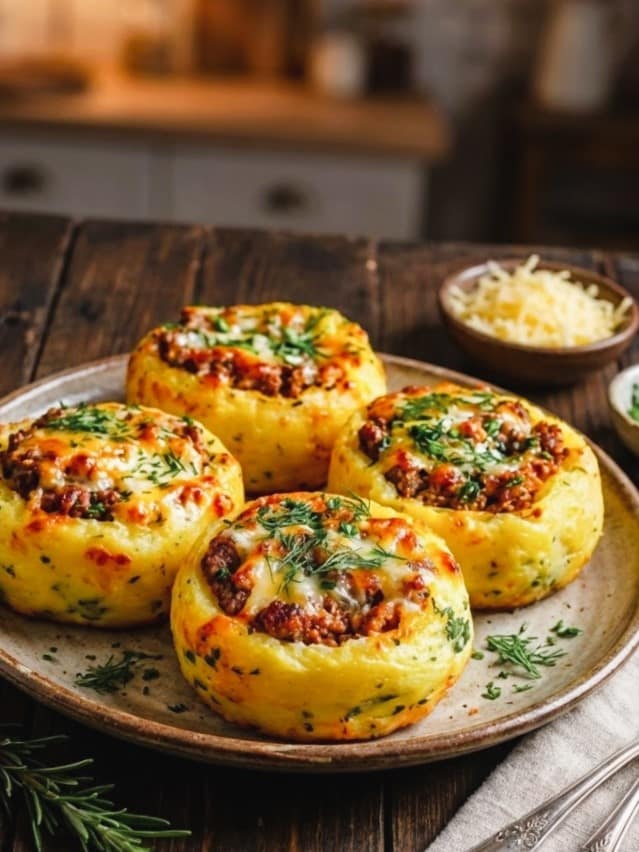
Stuffed mashed potato nests are baked potato cups created by shaping seasoned mashed potatoes into small nest-like circles and then filling them with a warm mixture of vegetables, cheese, herbs, and optionally halal shredded chicken. They bake until the edges become golden and crisp, while the filling stays soft, melty, and flavorful.
The beauty of this recipe lies in its versatility. You can customize the filling to match your preferences, add more or fewer spices, and adjust the texture from smooth and creamy to slightly rustic. Traditional mashed potatoes are transformed into an eye-catching dish that feels special without being complicated.
Why You’ll Love This Recipe
- Easy pantry ingredients
- Kid-friendly and great for picky eaters
- Works as an appetizer, snack, or light meal
- Can be made vegetarian
- Customizable filling options
- Perfect for parties and gatherings
- Freezer-friendly with minor adjustments
Stuffed mashed potato nests have the perfect balance of creamy interiors, crispy edges, and a flavorful center that makes them irresistible every time.
Ingredients for Stuffed Mashed Potato Nests
For the Mashed Potato Nests
These ingredients form the base structure of your nests, giving them firmness, flavor, and beautiful golden color during baking.
- Potatoes (4 large, peeled and chopped)
- Butter (2 tbsp, softened)
- Shredded cheddar cheese (0.5 cup)
- Salt (1 tsp)
- Black pepper (0.5 tsp)
- Garlic powder (0.5 tsp)
- Egg (1, beaten)
For the Savory Stuffing
This is the delicious center of the dish. You can use vegetables, halal chicken, or a fully vegetarian filling.
- Olive oil (1 tbsp)
- Diced onions (0.5 cup)
- Diced bell peppers (0.5 cup)
- Sweet corn, boiled (0.5 cup)
- Cooked shredded chicken, optional (0.25 cup)
- Paprika (0.5 tsp)
- Dried oregano (0.5 tsp)
- Salt (0.5 tsp)
- Black pepper (0.25 tsp)
- Shredded mozzarella cheese (0.5 cup)
For Garnish
- Fresh parsley, chopped (1 tbsp)
- Extra shredded cheddar or Parmesan (1 tbsp)
How to Make Stuffed Mashed Potato Nests
Preparing the Mashed Potatoes
Making perfectly creamy and smooth mashed potatoes is the foundation of this recipe. The texture matters because the nests must be soft enough to shape but firm enough to hold their structure during baking.
Boil the Potatoes
Start by peeling and chopping your potatoes into evenly sized pieces. Place them in a pot of salted water and boil until soft. A fork should easily slide through the center when they’re ready.
Once boiled, drain them completely—excess water can make the nests too soft. Let them steam dry for a few minutes before mashing.
Mash and Season
While still warm, mash the potatoes until smooth. Add softened butter, shredded cheddar cheese, salt, pepper, and garlic powder. Mix thoroughly until fully combined.
The final step is adding the beaten egg. This helps bind the mixture and allows the nests to crisp beautifully in the oven. Mix just until everything is evenly incorporated.
Shaping the Potato Nests
Forming the Base
Line a baking sheet with parchment paper. Using a scoop or spoon, place small mounds of the potato mixture onto the sheet.
Using the back of a spoon, press gently into the center of each mound to create an indentation. This forms the characteristic nest shape. Smooth the edges so they hold up during baking.
Initial Bake
Preheat your oven to 200°C. Place the tray inside and bake the nests for 12–15 minutes. You’re not fully baking them yet—just firming them up enough to hold the filling.
Once they turn lightly golden around the edges, remove them from the oven.
Preparing the Stuffing
Cooking the Filling
Heat olive oil in a pan over medium heat. Add onions and cook until soft and translucent. Then add diced bell peppers and corn. Stir and cook until they begin to soften.
If you want to include shredded halal chicken, now is the time to add it. The chicken should already be cooked.
Season the mixture with paprika, oregano, salt, and black pepper. Cook for another 3–4 minutes until everything blends together. Turn off the heat and stir in shredded mozzarella so it becomes creamy.
Filling and Final Baking
Add the Filling
Spoon the warm mixture into the center of each baked potato nest. Pack it gently so the filling stays in place but doesn’t overflow.
Final Bake
Return the filled nests to the oven and bake for another 10 minutes or until the cheese melts and the tops turn lightly golden.
Once done, remove them from the oven and allow them to rest for a few minutes before serving.
Serving Suggestions
Stuffed mashed potato nests are versatile and pair well with several dishes. Here are some serving ideas:
- Serve with a fresh green salad for a balanced light meal.
- Pair with grilled chicken or roasted vegetables.
- Use as a starter before a main course.
- Serve with mint yogurt dip or garlic mayo for added flavor.
- Add them to a brunch spread alongside eggs and bread.
This dish works wonderfully for casual dinners, parties, brunch tables, and even lunchboxes.
Tips for Perfect Stuffed Mashed Potato Nests
Use Starchy Potatoes
Russet or similar starchy potatoes give the best texture for mashing and baking.
Drain Potatoes Well
Waterlogged potatoes make nests too soft, causing them to collapse.
Don’t Skip the Egg
The egg helps bind the mixture, giving structure and crispness.
Use Shredded Cheese inside the Nest Mixture
This adds flavor and helps the potatoes hold shape.
Avoid Overfilling
Too much stuffing can cause the nest to overflow during baking.
Variations to Try
Vegetarian Stuffed Mashed Potato Nests
Skip the chicken and use more vegetables like mushrooms, peas, or carrots.
Spicy Version
Add chili flakes, diced green chilies, or hot paprika for heat.
Cheese Lover’s Version
Add extra mozzarella or a mix of cheddar and Monterey Jack.
Mediterranean Version
Add olives, sun-dried tomatoes, spinach, and feta.
Kids’ Favorite
Use corn, mild cheese, and a little butter for a sweeter, softer flavor.
Storage and Reheating
Refrigeration
Place leftovers in an airtight container and refrigerate for up to 2 days.
Reheating
Reheat in the oven or air fryer to restore crispness. Avoid reheating in the microwave as it softens the texture.
Freezing
You can freeze the nests after shaping but before filling. Bake them directly from the freezer with an extra 3–5 minutes added to the cooking time.
Final Thoughts
Stuffed mashed potato nests are a delightful and comforting dish that combines crispy edges, creamy centers, and delicious fillings. This recipe is easy to customize, works well for many occasions, and uses budget-friendly ingredients that are easy to find year-round. Whether you’re cooking for family, hosting a gathering, or preparing a special snack, these nests always impress.
Stuffed Mashed Potato Nests Recipe
These stuffed mashed potato nests are a comforting, crowd-pleasing dish made with creamy mashed potatoes shaped into golden, crispy nests and filled with a savory mixture of vegetables, cheese, and herbs. Perfect as an appetizer, snack, or side dish, this recipe is beginner-friendly, budget-friendly, and ideal for family gatherings or weeknight meals.
Ingredients
For the Potato Nests
For the Stuffing
For Garnish
Instructions
Prepare the Mashed Potatoes
-
Boil the peeled and chopped potatoes in salted water until they are very soft. Drain completely to remove excess moisture. Mash them while still warm, then mix in butter, cheddar cheese, salt, pepper, garlic powder, and the beaten egg. Make sure the mixture is smooth, well-combined, and thick enough to hold shape.
Shape the Nests
-
Line a baking tray with parchment paper. Scoop portions of the potato mixture and form small round mounds. Using the back of a spoon, press the center gently to create a “nest” shape. Smooth the sides so they don’t collapse while baking.
Bake the Potato Nests
-
Preheat the oven to 200°C. Place the formed nests into the oven and bake for 12–15 minutes until the edges start turning golden and slightly crispy.
Prepare the Stuffing
-
While the nests bake, heat olive oil in a pan over medium heat. Sauté onions until soft, then add bell peppers and corn. If using chicken, stir it in now. Season with paprika, oregano, salt, and pepper. Cook for 3–4 minutes until everything is heated and lightly caramelized. Turn off the heat and fold in mozzarella so it melts slightly.
Fill the Nests
-
Remove the semi-baked nests from the oven. Spoon the warm stuffing into each nest, pressing gently to help them hold shape.
Final Bake
-
Return the filled nests to the oven for another 10 minutes until the cheese melts fully and the tops are lightly browned.
Garnish & Serve
-
Let them rest for 5 minutes. Sprinkle chopped parsley and extra cheese on top before serving. Enjoy warm.
Note
For extra crispiness, brush the potato nests with a little oil before baking.
You can make these vegetarian by skipping the chicken.
Add chilies or chili flakes for a spicier version.
Store leftovers in an airtight container in the fridge for up to 2 days.
Reheat in the oven or air fryer to keep the crisp texture.
You can freeze the shaped nests (unfilled) and bake them later.


