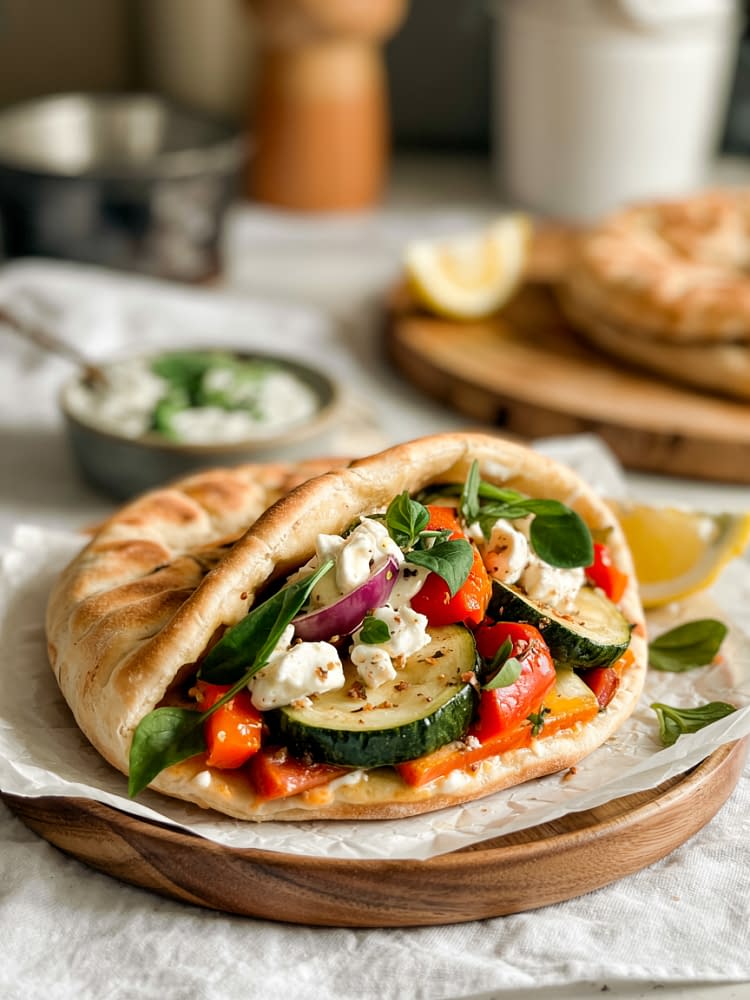
If you’re looking for a wholesome, delicious, and satisfying vegetarian meal that’s both simple to make and packed with flavor, the Roasted Veggie & Feta Pita Pocket is a perfect choice. This Mediterranean-inspired dish brings together tender roasted vegetables, creamy feta cheese, and a refreshing garlic-yogurt sauce, all tucked into warm, fluffy pita bread.
Whether you’re preparing a quick weekday lunch, a meal-prep-friendly dinner, or a healthy picnic option, this recipe is both flexible and filling. In this detailed post, you’ll find everything you need to master this dish, from a breakdown of ingredients to expert preparation tips, variations, and serving ideas.
Why You’ll Love This Roasted Veggie & Feta Pita Pocket
- Nutrient-packed: Made with fresh vegetables, calcium-rich cheese, and protein-filled Greek yogurt.
- Simple and approachable: Beginner-friendly with just a few cooking techniques.
- Customizable: Easily adapted with different vegetables, proteins, or sauces.
- Perfect for meal prep: Components can be made ahead for quick weekday assembly.
- Great for all seasons: Light enough for summer, hearty enough for colder months.
Ingredients Overview
For the Roasted Vegetables
- Zucchini – Mild and tender when roasted.
- Red and Yellow Bell Peppers – Naturally sweet and vibrant.
- Red Onion – Adds a savory, sweet depth when caramelized.
- Carrot – Adds crunch and earthiness.
- Olive Oil – Helps vegetables roast and enhances Mediterranean flavor.
- Seasonings – Oregano, smoked paprika, salt, and pepper create an herbaceous, savory base.
For the Garlic Yogurt Sauce
- Greek Yogurt – Thick, tangy, and rich in protein.
- Lemon Juice – Adds brightness and balance.
- Garlic – Gives the sauce a punch of flavor.
- Olive Oil and Salt – Add body and seasoning.
For Assembling
- Whole Wheat Pita Bread – Soft, nutty, and holds everything together.
- Feta Cheese – Crumbled for a sharp, tangy contrast.
- Spinach or Arugula – Fresh greens add crunch and color.
- Chopped Parsley (optional) – Offers a fresh finish.
Step-by-Step Instructions
Step 1: Prepare the Vegetables
Start by washing and thoroughly drying all vegetables. Cut the zucchini into half-moons, slice the bell peppers and onion thinly, and slice the carrot into thin rounds. Uniform cutting ensures even roasting and consistency in texture.
Tip: Dry vegetables roast better than wet ones. Pat dry after washing.
Step 2: Season and Roast
Preheat the oven to 200°C (392°F). Line a large baking sheet with parchment paper or foil.
Place all vegetables into a large bowl. Drizzle with olive oil and season with oregano, paprika, salt, and black pepper. Toss until everything is evenly coated, then spread the vegetables in a single layer on the baking sheet.
Roast for 25 minutes, turning halfway through, until tender and lightly browned.
Tip: Avoid crowding the vegetables. If needed, use two trays to ensure proper roasting.
Step 3: Make the Garlic Yogurt Sauce
While the vegetables are roasting, prepare the sauce. In a bowl, combine the Greek yogurt, lemon juice, minced garlic, olive oil, and a pinch of salt. Stir well until smooth. Set aside in the refrigerator until ready to serve.
Tip: For a milder garlic flavor, let the sauce sit for at least 15 minutes so the garlic mellows.
Step 4: Warm the Pita
Just before assembly, warm the pita bread. You can wrap the pitas in foil and heat them in the oven for 5 minutes, or place them in a dry skillet over medium heat for 1 to 2 minutes per side.
Warming the pita makes it more pliable and flavorful.
Step 5: Assemble the Pita Pockets
Cut a small section off the top of each pita to create an opening. Gently pry open the pocket.
Spread a spoonful of garlic yogurt sauce inside each pita. Layer in a handful of spinach or arugula. Add a generous amount of roasted vegetables, then top with crumbled feta cheese and a sprinkle of chopped parsley.
Serve immediately while the pitas are warm and the veggies are fresh.
Tips for Best Results
- Use fresh vegetables for optimal texture and flavor. Avoid overly soft or bruised produce.
- Crumble feta just before serving to preserve its shape and creaminess.
- Roast vegetables in a single layer to promote caramelization and prevent steaming.
- Don’t overfill the pitas to avoid tearing or spillage.
- Use tongs or a spoon to help layer the fillings cleanly and compactly.
Creative Variations
The base of this Roasted Veggie & Feta Pita Pocket is highly adaptable. Here are some delicious variations you can try:
Add More Vegetables
- Eggplant
- Mushrooms
- Cherry tomatoes
- Broccoli
- Roasted sweet potato
Swap the Cheese
- Goat cheese for a tangier flavor
- Labneh for a creamier texture
- Shredded mozzarella for a melty twist
- Dairy-free feta for a vegan option
Include Protein
- Grilled chicken
- Roasted chickpeas
- Falafel
- Boiled eggs
- Lentil patties
Add Condiments
- Hummus
- Tahini sauce
- Harissa
- Olive tapenade
Serving Suggestions
This recipe is highly versatile and pairs well with a variety of sides or beverages.
Pair With:
- Cucumber and tomato salad
- Mediterranean quinoa or couscous
- Roasted potatoes or sweet potato fries
- Tabbouleh
- Lentil soup
Serve As:
- A light lunch
- A vegetarian dinner
- A picnic meal
- A lunchbox filler
- A healthy party platter with mini pitas
Make-Ahead and Storage
Meal Prep:
Roast vegetables and make the yogurt sauce ahead of time. Store separately in the refrigerator.
Storage:
- Roasted vegetables: Up to 3 days in an airtight container.
- Yogurt sauce: Up to 5 days, refrigerated.
- Assembled pitas: Best eaten immediately to avoid sogginess.
Reheating:
Warm the vegetables in a skillet or microwave for a few minutes before assembling.
Freezing:
Not recommended for assembled pitas, but roasted vegetables can be frozen for up to 1 month. Thaw and reheat before use.
Nutritional Benefits
The Roasted Veggie & Feta Pita Pocket is a wholesome meal offering a range of health benefits:
- High in fiber from vegetables and whole wheat pita
- Rich in calcium and protein from feta and Greek yogurt
- Low in saturated fat and high in heart-healthy fats
- Contains antioxidants from colorful vegetables and herbs
It’s ideal for those seeking a balanced vegetarian diet or looking to include more plant-forward meals in their routine.
Final Thoughts
This Roasted Veggie & Feta Pita Pocket is a true celebration of bold, simple, and nourishing ingredients. It brings together everything you want in a balanced meal — freshness, comfort, flavor, and convenience.
It’s perfect for busy weekdays, casual gatherings, or whenever you’re craving something healthy that doesn’t compromise on taste. With its Mediterranean roots and adaptable nature, this recipe is sure to become a go-to favorite in your kitchen.
Roasted Veggie & Feta Pita Pocket
These Roasted Veggie & Feta Pita Pockets are packed with vibrant, caramelized vegetables, creamy feta cheese, and a tangy garlic-yogurt sauce, all tucked inside a warm, fluffy pita. Perfect for a quick and healthy lunch or a satisfying vegetarian dinner, this Mediterranean-inspired recipe is as delicious as it is nutritious.
Ingredients
For the Roasted Vegetables:
For the Garlic Yogurt Sauce:
For Assembling the Pita Pockets:
Instructions
Prepare the Vegetables
- Wash and chop all your vegetables as specified. Pat dry to ensure they roast nicely without steaming in the oven.
Season & Roast
- Toss all chopped vegetables with olive oil, oregano, paprika, salt, and pepper. Spread them on a baking sheet in a single layer and roast at 200°C (392°F) for 25 minutes or until tender and slightly charred.
Make the Garlic Yogurt Sauce
- In a small bowl, whisk together Greek yogurt, lemon juice, minced garlic, olive oil, and a pinch of salt. Chill in the fridge while vegetables are roasting.
Warm the Pita
- Wrap the pitas in foil and warm them in the oven for the last 5 minutes of vegetable roasting. Alternatively, heat them on a skillet for 1–2 minutes per side.
Assemble the Pita Pockets
- Cut the top third off each pita to create a pocket. Spread a spoonful of garlic yogurt sauce inside, stuff with a handful of spinach or arugula, then fill generously with roasted vegetables. Top with crumbled feta and chopped parsley.
Serve
- Serve warm or at room temperature. Drizzle with more yogurt sauce if desired.
Note
Storage: Store roasted vegetables and yogurt sauce separately in airtight containers for up to 3 days. Reheat veggies before assembling.
Variations: Add hummus, olives, sun-dried tomatoes, or grilled halloumi for extra flavor.
Make it vegan: Swap Greek yogurt for plant-based yogurt and use vegan feta.


