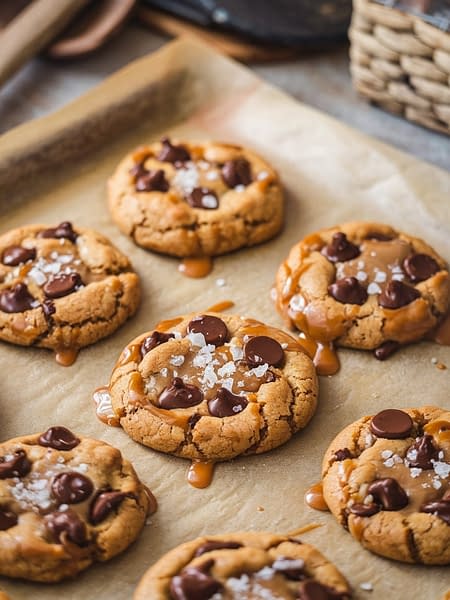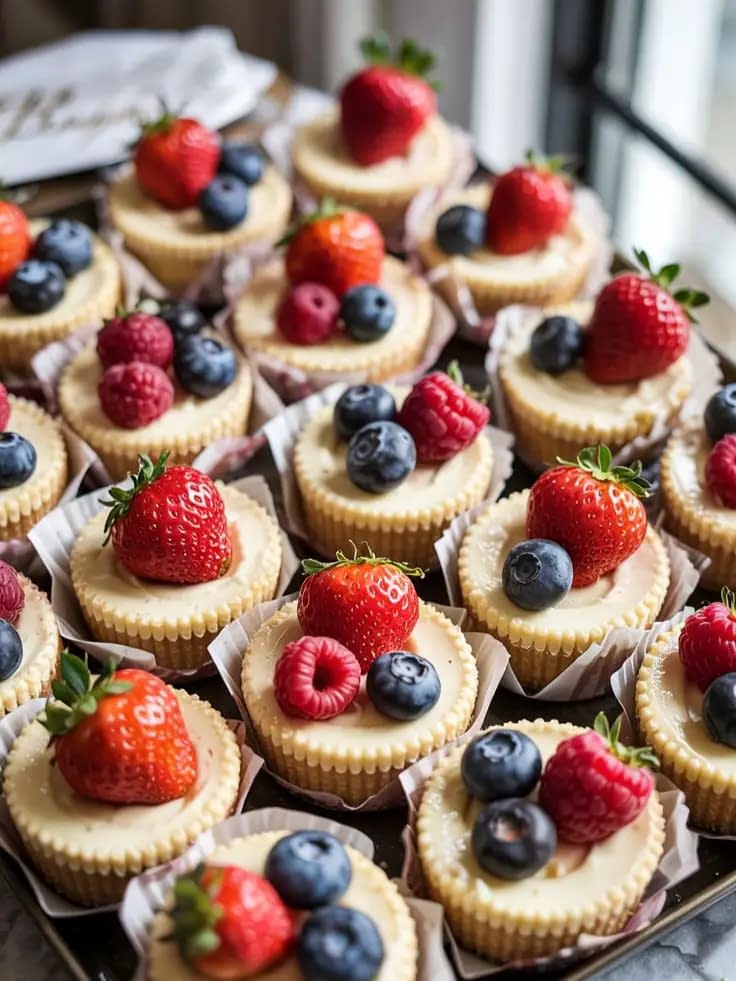

Mini desserts are having their moment—and for good reason. They’re charming, easy to serve, and just the right size to satisfy a sweet craving without going overboard. This Mini Cheesecake Bites with Fresh Berries Recipe combines all the indulgent richness of traditional cheesecake with the light, fresh appeal of ripe seasonal berries. Whether you’re planning a baby shower, brunch, wedding reception, or casual summer picnic, these little bites deliver big on flavor and presentation.
Why You’ll Love This Recipe
- Perfectly Portioned: No slicing, no mess—each guest gets their own little cheesecake.
- Beginner-Friendly: Simple ingredients, easy techniques, and minimal baking skills required.
- Versatile: You can customize the toppings, crust, and flavor base.
- Make-Ahead Friendly: Great for prepping the night before events.
- Gorgeous Presentation: Fresh berries add a pop of color and elegance.
Ingredients Breakdown
For the Crust
- 1 ½ cups graham cracker crumbs (finely crushed)
- 2 tbsp granulated sugar
- 6 tbsp unsalted butter (melted)
For the Cheesecake Filling
- 450 g (16 oz) cream cheese (room temperature)
- ½ cup granulated sugar
- 1 tsp pure vanilla extract
- 2 large eggs (room temperature)
- ¼ cup sour cream (full-fat preferred)
- 1 tbsp all-purpose flour
For the Topping
- 1 cup fresh strawberries (hulled and sliced)
- ½ cup blueberries
- ½ cup raspberries
- 2 tbsp honey or fruit glaze (optional for shine)
Equipment You’ll Need
- 24-count mini muffin tin
- Mini cupcake liners (paper or silicone)
- Electric mixer or hand whisk
- Mixing bowls
- Rubber spatula
- Measuring cups & spoons
- Small spoon or tamper (for crust)
- Cooling rack
- Refrigerator space
Step-by-Step Instructions
Step 1: Preheat & Prepare
Preheat your oven to 160°C (325°F). Line your mini muffin pan with liners to make removal easier later.
Step 2: Make the Crust
In a medium mixing bowl, combine the graham cracker crumbs, sugar, and melted butter. Stir until the mixture resembles wet sand. Spoon about 1 tablespoon into each liner and press down firmly using the back of a spoon or a tamper.
Step 3: Bake the Crust
Bake for 5 minutes to set the crusts. Remove and let cool while you prepare the filling.
Step 4: Mix the Cheesecake Filling
In a large mixing bowl, beat the cream cheese until smooth and creamy (about 1-2 minutes). Add the sugar and vanilla extract and beat until fully incorporated. Add eggs one at a time, mixing gently after each addition. Fold in the sour cream and flour just until blended.
Step 5: Fill and Bake
Divide the batter evenly among the muffin cups, filling each about ¾ full. Bake for 13–15 minutes or until the centers are set with a slight jiggle. Do not overbake.
Step 6: Cool Slowly
Turn off the oven and crack the oven door open. Let cheesecakes cool inside for 10 minutes, then transfer to a cooling rack for another 30 minutes.
Step 7: Chill Completely
Refrigerate for at least 2 hours, or preferably overnight, until fully chilled and firm.
Step 8: Top with Berries
Before serving, top each mini cheesecake with a mix of fresh strawberries, blueberries, and raspberries. Brush lightly with honey or fruit glaze for a bakery-style finish.
Expert Tips
- Room Temperature Ingredients: Always use room temp cream cheese and eggs to avoid lumps.
- Avoid Overmixing: Overmixing can cause cracking. Mix gently, especially after adding eggs.
- No Tamper? Use a wine cork, shot glass, or the back of a small spoon to press the crusts.
- Berries Not in Season? Use fruit preserves, frozen berries (thawed and drained), or canned pie filling.
Variations
- Chocolate Swirl: Drop a teaspoon of melted chocolate into each cup and swirl before baking.
- Citrus Zest: Add lemon or orange zest to the batter for a fresh zing.
- Cookie Crust: Substitute graham crackers with crushed Oreos or digestive biscuits.
- No-Bake Version: Skip the oven by using gelatin or whipped cream in the filling and chilling until firm.
Serving Suggestions
- Serve chilled, topped with berries just before serving.
- Add a mint leaf for garnish at parties.
- Plate with a drizzle of raspberry or chocolate sauce for elegance.
- Pair with coffee, tea, or a glass of bubbly for upscale events.
Storage & Make-Ahead
- Refrigerator: Store in an airtight container for up to 4 days.
- Freezer: Freeze (without topping) for up to 1 month. Thaw in the fridge overnight.
- Make-Ahead: Prepare 1–2 days in advance for events. Add fruit topping the day of serving.
Final Thoughts
This Mini Cheesecake Bites with Fresh Berries Recipe is a celebration of simplicity and elegance. With just a handful of ingredients and a few easy steps, you can create a dessert that looks as good as it tastes. Whether you’re baking for a crowd or a quiet evening at home, these cheesecake bites are always a crowd-pleaser. Light, creamy, and topped with nature’s candy, they strike the perfect balance between indulgence and freshness.
Try them out, and you’ll see why this recipe deserves a permanent spot in your dessert rotation.
Mini Cheesecake Bites with Fresh Berries Recipe
Creamy, smooth, and perfectly portioned, these Mini Cheesecake Bites with Fresh Berries are the ultimate bite-sized dessert for parties, picnics, or weeknight cravings. Topped with colorful fresh berries and nestled in a buttery graham cracker crust, they're easy to make, elegant to serve, and irresistibly delicious.
Ingredients
For the Crust:
For the Cheesecake Filling:
For the Topping:
Instructions
Preheat the Oven & Prep the Pan
- Preheat your oven to 160°C. Line a 24-count mini muffin pan with paper or silicone liners.
Make the Graham Cracker Crust
- In a bowl, combine graham cracker crumbs, sugar, and melted butter. Stir until evenly moist. Spoon about 1 tablespoon of the crumb mixture into each mini muffin liner. Press firmly using the back of a spoon or a small tamper.
Bake the Crust
- Bake the crusts for 5 minutes. Remove and let cool slightly while preparing the filling.
Prepare the Cheesecake Batter
- In a large bowl, beat the cream cheese until smooth and creamy (about 1–2 minutes). Add sugar and vanilla extract. Mix until fully combined. Beat in eggs one at a time, scraping the sides of the bowl as needed. Add sour cream and flour. Mix until just combined. Do not overmix.
Fill the Cups and Bake
- Divide the batter evenly among the muffin cups (about 1 tablespoon each). Bake for 13–15 minutes, or until centers are set but slightly jiggly in the middle. Turn off the oven, crack the door open, and let them cool inside for 10 minutes. Then transfer to the counter to cool for another 30 minutes before chilling.
Chill and Add Toppings
- Refrigerate cheesecakes for at least 2 hours or until fully chilled and set. Before serving, top each cheesecake bite with a mix of fresh strawberries, blueberries, and raspberries. Brush with a light layer of honey or glaze if desired for added shine.
Note
Make Ahead: These cheesecake bites can be made 1–2 days in advance and stored in the fridge.
Storage: Store in an airtight container in the refrigerator for up to 4 days.
Freezing: Freeze without fruit topping for up to 1 month. Thaw overnight in the fridge and top before serving.
Flavor Variations: Swap vanilla with lemon zest or almond extract for a flavor twist.
Topping Ideas: Try chocolate ganache, caramel drizzle, or crushed nuts instead of berries.