
There is something incredibly satisfying about a dessert that looks elegant, tastes luxurious, and requires no baking at all. Biscoff Cheesecake Cups are exactly that kind of treat. With layers of buttery biscuit crumbs, silky smooth cheesecake filling, and a glossy Biscoff topping, these individual dessert cups deliver bakery-style indulgence with minimal effort.
Whether you are preparing a dessert for a family gathering, a birthday celebration, or simply treating yourself after a long week, these cheesecake cups offer the perfect balance of convenience and decadence. The caramelized flavor of Biscoff biscuits combined with creamy cheesecake creates a rich, spiced sweetness that feels comforting in every spoonful.
In this detailed guide, you will learn everything you need to know about making perfect Biscoff Cheesecake Cups at home. From selecting ingredients to mastering texture, layering techniques, storage tips, and creative variations, this post covers it all in depth.
Why You Will Love These Biscoff Cheesecake Cups
No-Bake Convenience
One of the biggest advantages of this dessert is that it requires no oven. That makes it ideal for warm weather, busy schedules, or when you simply do not want to deal with baking.
Perfect Individual Portions
Serving cheesecake in cups makes portion control simple and presentation beautiful. Each guest gets their own neatly layered dessert, eliminating the need to slice and serve.
Rich Yet Balanced Flavor
Biscoff spread has a warm caramel flavor with subtle spice notes. When blended into cheesecake filling, it creates a dessert that feels indulgent but not overly heavy.
Beginner-Friendly Recipe
Even if you have never made cheesecake before, this recipe is approachable. The process focuses on mixing, folding, layering, and chilling.
What Makes Biscoff So Special?
Biscoff biscuits are known for their unique caramelized taste and crisp texture. When crushed, they create a flavorful base that goes beyond plain digestive biscuits or graham crackers. The spread version, often referred to as cookie butter, blends those same caramel notes into a smooth, creamy paste.
In Biscoff Cheesecake Cups, the flavor works in three layers:
- The biscuit base provides crunch and buttery sweetness.
- The cheesecake filling adds creamy richness.
- The topping intensifies the signature caramel flavor.
Together, these layers create contrast in both texture and taste.
Ingredients Breakdown and Their Role
Understanding each ingredient helps ensure consistent results.
For the Biscuit Base
Biscoff biscuits
These form the foundation. When crushed finely, they create a compact yet slightly crumbly base.
Unsalted butter
Melted butter binds the crumbs together. It solidifies once chilled, helping the base hold its shape.
For the Cheesecake Filling
Full-fat cream cheese
This provides structure and richness. Full-fat versions produce the smoothest texture.
Whipping cream
Whipped cream lightens the filling, transforming it from dense to airy and mousse-like.
Biscoff spread
This is the flavor core of the dessert. It adds sweetness and depth.
Powdered sugar
Ensures smooth sweetness without graininess.
Vanilla extract
Enhances overall flavor without overpowering the Biscoff notes.
For the Topping
Melted Biscoff spread
Adds visual appeal and reinforces flavor.
Crushed biscuits or halves
Provide decorative contrast and texture.
Step-by-Step Preparation Guide
Preparing the Biscuit Base
Start by crushing the Biscoff biscuits into fine crumbs. The texture should resemble sand. Large chunks will prevent the base from compacting properly.
Mix the crumbs with melted butter until evenly coated. Press firmly into serving cups. The key here is pressure. Use the back of a spoon or a flat-bottomed glass to compress the mixture tightly.
Chill for at least 20 to 30 minutes. This allows the butter to firm up and stabilize the base.
Making the Cheesecake Filling
Begin with room temperature cream cheese. Cold cream cheese creates lumps that are difficult to remove.
Beat the cream cheese until smooth. Add powdered sugar and vanilla extract, mixing thoroughly. Incorporate the Biscoff spread and blend until uniform in color and texture.
In a separate chilled bowl, whip cold whipping cream until stiff peaks form. The cream should hold its shape but still look smooth.
Gently fold the whipped cream into the cream cheese mixture using a spatula. Folding rather than mixing preserves air, resulting in a light texture.
Assembling the Layers
Remove the chilled bases from the refrigerator. Spoon or pipe the filling evenly into each cup. Smooth the top carefully.
Tap the cups lightly on the counter to eliminate air pockets.
Warm a small amount of Biscoff spread just until pourable. Drizzle over the top layer. Garnish with crushed biscuits.
Refrigerate for at least two hours or overnight for best results.
Tips for Perfect Texture
Use Room Temperature Cream Cheese
Cold cream cheese results in lumps. Always let it sit out for 30 to 45 minutes before mixing.
Do Not Overwhip the Cream
Overwhipped cream becomes grainy and may separate. Stop once stiff peaks form.
Fold Gently
Aggressive stirring will deflate the mixture. Use slow, sweeping motions.
Chill Properly
The chilling process is not optional. It allows the filling to set and flavors to develop.
Creative Variations
Chocolate Biscoff Cheesecake Cups
Add a layer of chocolate ganache between the biscuit base and cheesecake filling for extra richness.
Nutty Crunch Version
Sprinkle finely chopped toasted nuts between layers for added texture.
Mini Party Shooters
Prepare the dessert in small shot glasses for events and buffets.
Frozen Cheesecake Cups
Freeze for 30 to 45 minutes before serving for a semi-frozen texture similar to ice cream cheesecake.
Layered Parfait Style
Alternate layers of crumbs and filling multiple times for a dramatic visual effect.
Serving Suggestions
Biscoff Cheesecake Cups are versatile and suitable for many occasions.
Serve them:
- At birthday parties
- During holiday gatherings
- As part of a dessert buffet
- For afternoon tea
- As a make-ahead dinner party dessert
Pair with:
- Fresh strawberries or raspberries
- A drizzle of dark chocolate
- A cup of coffee or cappuccino
- Warm milk for a comforting dessert pairing
Storage and Make-Ahead Tips
Refrigeration
Store covered in the refrigerator for up to three days. The texture remains stable, though the base may soften slightly over time.
Freezing
These cups can be frozen for up to one month. Thaw in the refrigerator before serving.
Make-Ahead Strategy
Prepare the cups one day in advance. The flavor improves as it rests.
Common Mistakes to Avoid
Using low-fat cream cheese
This can result in a runny filling.
Skipping the chilling time
The layers will not set properly.
Adding too much melted spread
Excess liquid topping may sink into the filling.
Not pressing the base firmly
A loose base will crumble when scooped.
Nutritional Considerations
Biscoff Cheesecake Cups are an indulgent dessert. They are rich in dairy and sugar, so portion size matters.
To lighten the recipe slightly:
- Reduce sugar by a few tablespoons.
- Use slightly less topping.
- Serve in smaller cups.
For special dietary needs, you can experiment with dairy-free cream cheese and plant-based whipping cream alternatives.
Why This Recipe Works
The success of these cheesecake cups lies in balance:
- Fat from cream cheese provides structure.
- Air from whipped cream ensures lightness.
- Butter binds the base.
- Chilling stabilizes everything.
Each step builds upon the previous one, resulting in a dessert that feels complex yet is simple to prepare.
Occasions and Seasonal Appeal
Although perfect year-round, these cheesecake cups are especially convenient during warmer months when turning on the oven feels unnecessary. They are equally fitting for festive occasions like birthdays, weddings, and family celebrations.
Their elegant layered presentation makes them look professionally crafted, even though they are simple to assemble.
Final Thoughts
Biscoff Cheesecake Cups combine simplicity and indulgence in the most satisfying way. The buttery cookie base, creamy cheesecake filling, and rich caramelized topping create a dessert that feels both comforting and impressive.
This recipe is beginner-friendly yet versatile enough for creative adaptations. Once you master the technique, you can experiment with flavors, textures, and presentation styles.
If you are looking for a dessert that delivers flavor, beauty, and ease all in one, these cheesecake cups are an excellent choice. With proper technique and a little patience during chilling, you will achieve a smooth, balanced, and truly memorable treat every time.
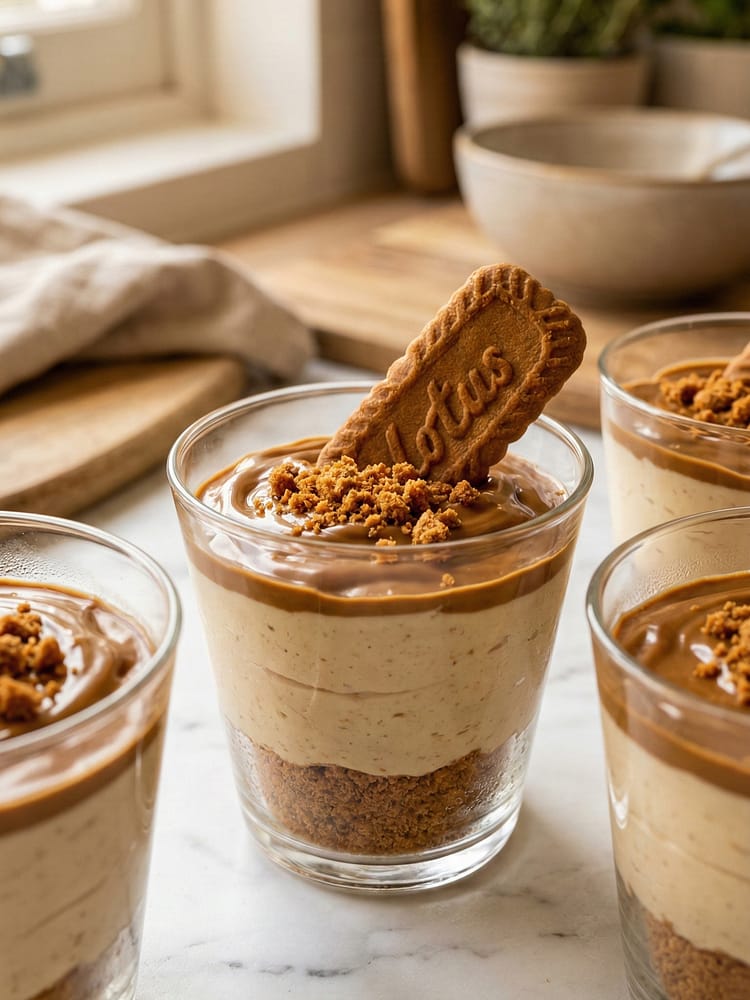
Biscoff Cheesecake Cups
These creamy and indulgent Biscoff Cheesecake Cups are a no-bake dessert made with a buttery cookie base, smooth cream cheese filling, and rich Biscoff spread. Perfect for parties, gatherings, or quick sweet cravings, this easy layered dessert comes together effortlessly and delivers bakery-style flavor in every spoonful.
Ingredients
For the Biscuit Base
For the Cheesecake Filling
For the Topping
Instructions
Prepare the Biscuit Base
-
Crush the Biscoff biscuits into very fine crumbs using a food processor or by placing them in a zip bag and crushing with a rolling pin. Transfer the crumbs to a mixing bowl and pour in the melted butter. Mix thoroughly until the texture resembles wet sand.
-
Divide the mixture evenly into 6 serving cups and press firmly using the back of a spoon to create a compact base layer. Place the cups in the refrigerator for 20–30 minutes to firm up.
Whip the Cream
-
In a chilled mixing bowl, pour the cold whipping cream. Beat with an electric mixer on medium-high speed until stiff peaks form. The cream should hold its shape but still look smooth and creamy. Do not overwhip.
Prepare the Cheesecake Filling
-
In another bowl, beat the softened cream cheese until smooth and lump-free. Add powdered sugar and vanilla extract, and mix until creamy.
-
Add the Biscoff spread and beat again until fully incorporated. The mixture should be smooth and glossy.
-
Gently fold the whipped cream into the cream cheese mixture using a spatula. Fold carefully to maintain the airy texture. This creates a light, mousse-like cheesecake filling.
Assemble the Cups
-
Remove the chilled biscuit base cups from the refrigerator. Spoon or pipe the cheesecake filling evenly over the biscuit base in each cup. Smooth the tops using a spoon or offset spatula.
-
Tap the cups lightly on the counter to remove any air bubbles.
Add the Topping
-
Slightly warm the Biscoff spread for 10–15 seconds in the microwave until pourable (not hot). Drizzle over the cheesecake layer.
-
Garnish with crumbled Biscoff biscuits or place a half biscuit upright for a decorative finish.
-
Chill the assembled cups for at least 2 hours (or overnight) until fully set.
Serve
-
Serve chilled. The cheesecake should be firm yet creamy, with distinct layers and a rich caramel-spiced flavor in every bite.
Note
- Always use room temperature cream cheese to avoid lumps.
- Use cold whipping cream for better volume.
- For a firmer texture, chill overnight.
- You can freeze the cups for 30 minutes before serving for a semi-frozen cheesecake texture.
- Store covered in the refrigerator for up to 3 days.
- For variation, add a layer of chocolate ganache between the base and cheesecake filling.
- To make it lighter, reduce sugar slightly as Biscoff spread is already sweet.


